

Does anyone have a handy picture of where the 3.5 style headlights need to be attached to the frame? I bought a set from Ariel but they came with no instructions (is that normal?)......
I heard there is something that needs to be drilled for the fronts but have no idea where. Any tips or pics would be greatly appreciated!
Cheers.
3.5 headlight info please!


Re: 3.5 headlight info please!
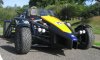
Hopefully these will help.
I'm afraid my car needs a clean.
Alan
I'm afraid my car needs a clean.
Alan
- Attachments
-
- 20210422_200845.jpg (1.94 MiB) Viewed 904 times
-
- 20210422_200852.jpg (1.93 MiB) Viewed 904 times
-
- 20210422_200857.jpg (1.94 MiB) Viewed 904 times
Beautiful 2000 XJR, last ever supercharged Atom, Fiesta Active, 'Verstappen' Honda e, Focus, Jaguar iPace, Volcano Yellow, MSO Black Pack 720S Spider.
Re: 3.5 headlight info please!
Perfect, thanks a lot [mention]AlanP[/mention] !
-
John Scherrer
- Global Moderator
- Posts: 5124
- Joined: Sat Mar 07, 2009 1:20 pm
- Location: Willington, Bedford UK
- Contact:
Re: 3.5 headlight info please!
This is the only relevant photo I have - not sure it shows anything more than Alan's
- taken at Ariel's stand NEC Autosport Jan 2013.
- taken at Ariel's stand NEC Autosport Jan 2013.
- Attachments
-
- 20130113_141404.jpg (1.09 MiB) Viewed 885 times
Atom 3 310 Supercharged (2011), Now Sold
-
John Scherrer
- Global Moderator
- Posts: 5124
- Joined: Sat Mar 07, 2009 1:20 pm
- Location: Willington, Bedford UK
- Contact:
Re: 3.5 headlight info please!
Here's a link to a previous discussion about fitting the 3.5 projector units :-
viewtopic.php?f=33&t=17398
viewtopic.php?f=33&t=17398
Atom 3 310 Supercharged (2011), Now Sold

Re: 3.5 headlight info please!
I did mine in March. Here's my attempt at some instructions:
1. Disconnect the battery.
2. Remove the front bonnet and then the black cover that holds the aero screens (can't remember it's name!).
3. Undo the 2 connectors from the headlights, cut any cable ties and then remove the headlights each side. Mark which connector is which.
4. Remove the bonnet, and then the nose cone - 7 Allen headed bolts in total, and remember to unplug the connectors for the indicators.
5. Jack the front of the car up using the lower wishbones as close the the body as possible, and place it on jack stands using the 2 chassis rails and remove the front wheels.
6. Remove the front top wishbone bolt on both sides so you can then remove the existing side/indicator light brackets - cut any cable ties.
7. Push the wishbone down out of the mount and keep it held there - you don't need to undo the other top wishbone mount.
8. Attach the new front light bracket, push the wishbone back in place and push through the bolt through very carefully (don't force it or you'll damage the thread).
9. Loosely attach the wishbone bolt, put some masking tape over the chassis mount so you can mark the new hole.
10. Push the bracket to the wishbone so you can mark the position of the new bolt hole on the chassis - I used a pencil and then a centre punch. Do this on both sides.
11. Remove the brackets again and push the wishbone out of the way, and then remove the masking tape.
12. Using a 6mm metal drill bit, set your drill to a very slow setting and drill out the hole slowly. Repeat on the other side.
13. Deburr the hole with a small file and put some grease on each side to stop it rusting.
14. Now the most difficult bit - keeping the wishbone pushed away from the mount, put the bolt through the new light bracket and push this into the new hole - you may need someone to hold the bracket whilst you do this. You then need to push your fingers up inside the chassis mount whilst holding the nyloc nut until you can screw it on to the bolt. I used a 10mm spanner and some blue tac to hold the nut in place whilst trying to screw the bolt into it. This may well take some time and you will swear a lot....
15. Once the nyloc nut is on the back of the bolt, you can tighten it enough to hold the weight of the bracket.
16. Push the wishbone back into its mount and bolt up the new bracket, but DON'T tighten it fully, as you must only do this when it is sitting back on its wheels, so the metalastic bush is in the correct (fully loaded) position.
17. Attach the new connectors to the old connectors.
18. Re-attach the battery and test the lights are working.
19. Assuming they are, disconnect the battery again and use some cable ties to attach the new wires to the frame at the back of the radiator and around the chassis.
20. Now put the wheels back on and lower the car back onto the ground - don't torque the wheel nuts yet.
21. Tighten the wishbone bolts to 80Nm.
22. Jack the front of the car up again and reattach the nose cone.
23. Drop it down and tighten the wheels nuts to 96Nm.
24. Now jack up the back of the car, place on jack stands and remove the rear wheels. You can do this one at a time if you don't jack the car up too far.
25. Undo the connectors and cut the cable ties.
26. Undo the relevant top back wishbone mount and remove the old light bracket.
27. Attach the new bracket and reattach the connectors and cable ties.
28. Attach the wishbone bolts but again don't tighten them up too much.
29. Put the wheels back on and drop the car to the ground.
30. Now tighten the wishbone bolts up to 80Nm, but you may have to loosen them a few times and fiddle with the brackets to ensure both light brackets are the same level.
31. Put the other body parts back on and reconnect the battery.
32. Switch on the ignition and try out your new lights!
33. Once they are working you will need to then remove the front covers from the front lights and adjust the dipped and main beam. I did this on a flat road in the dark. You'll see the adjustment screws each side and below the side and headlights. This takes some time as it is case of trial and error...
Here are some photos of them. I was also painting my wishbones so I had the car jacked up already.
I hope this helps. If anybody has any other tips/ideas or if I have missed anything, please feel free to comment.
Good luck.
1. Disconnect the battery.
2. Remove the front bonnet and then the black cover that holds the aero screens (can't remember it's name!).
3. Undo the 2 connectors from the headlights, cut any cable ties and then remove the headlights each side. Mark which connector is which.
4. Remove the bonnet, and then the nose cone - 7 Allen headed bolts in total, and remember to unplug the connectors for the indicators.
5. Jack the front of the car up using the lower wishbones as close the the body as possible, and place it on jack stands using the 2 chassis rails and remove the front wheels.
6. Remove the front top wishbone bolt on both sides so you can then remove the existing side/indicator light brackets - cut any cable ties.
7. Push the wishbone down out of the mount and keep it held there - you don't need to undo the other top wishbone mount.
8. Attach the new front light bracket, push the wishbone back in place and push through the bolt through very carefully (don't force it or you'll damage the thread).
9. Loosely attach the wishbone bolt, put some masking tape over the chassis mount so you can mark the new hole.
10. Push the bracket to the wishbone so you can mark the position of the new bolt hole on the chassis - I used a pencil and then a centre punch. Do this on both sides.
11. Remove the brackets again and push the wishbone out of the way, and then remove the masking tape.
12. Using a 6mm metal drill bit, set your drill to a very slow setting and drill out the hole slowly. Repeat on the other side.
13. Deburr the hole with a small file and put some grease on each side to stop it rusting.
14. Now the most difficult bit - keeping the wishbone pushed away from the mount, put the bolt through the new light bracket and push this into the new hole - you may need someone to hold the bracket whilst you do this. You then need to push your fingers up inside the chassis mount whilst holding the nyloc nut until you can screw it on to the bolt. I used a 10mm spanner and some blue tac to hold the nut in place whilst trying to screw the bolt into it. This may well take some time and you will swear a lot....
15. Once the nyloc nut is on the back of the bolt, you can tighten it enough to hold the weight of the bracket.
16. Push the wishbone back into its mount and bolt up the new bracket, but DON'T tighten it fully, as you must only do this when it is sitting back on its wheels, so the metalastic bush is in the correct (fully loaded) position.
17. Attach the new connectors to the old connectors.
18. Re-attach the battery and test the lights are working.
19. Assuming they are, disconnect the battery again and use some cable ties to attach the new wires to the frame at the back of the radiator and around the chassis.
20. Now put the wheels back on and lower the car back onto the ground - don't torque the wheel nuts yet.
21. Tighten the wishbone bolts to 80Nm.
22. Jack the front of the car up again and reattach the nose cone.
23. Drop it down and tighten the wheels nuts to 96Nm.
24. Now jack up the back of the car, place on jack stands and remove the rear wheels. You can do this one at a time if you don't jack the car up too far.
25. Undo the connectors and cut the cable ties.
26. Undo the relevant top back wishbone mount and remove the old light bracket.
27. Attach the new bracket and reattach the connectors and cable ties.
28. Attach the wishbone bolts but again don't tighten them up too much.
29. Put the wheels back on and drop the car to the ground.
30. Now tighten the wishbone bolts up to 80Nm, but you may have to loosen them a few times and fiddle with the brackets to ensure both light brackets are the same level.
31. Put the other body parts back on and reconnect the battery.
32. Switch on the ignition and try out your new lights!
33. Once they are working you will need to then remove the front covers from the front lights and adjust the dipped and main beam. I did this on a flat road in the dark. You'll see the adjustment screws each side and below the side and headlights. This takes some time as it is case of trial and error...
Here are some photos of them. I was also painting my wishbones so I had the car jacked up already.
- IMG_20210224_153122.jpg (2.49 MiB) Viewed 868 times
- IMG_20210224_153147.jpg (1.38 MiB) Viewed 854 times
Good luck.
2008 Supercharged Atom 3, Tesla Model 3 Long Range
-
John Scherrer
- Global Moderator
- Posts: 5124
- Joined: Sat Mar 07, 2009 1:20 pm
- Location: Willington, Bedford UK
- Contact:
Re: 3.5 headlight info please!
What a great write-up, thanks for doing this 
Atom 3 310 Supercharged (2011), Now Sold
Re: 3.5 headlight info please!
I am borderline amazed to see the car looking like that!
Alan
Alan
Beautiful 2000 XJR, last ever supercharged Atom, Fiesta Active, 'Verstappen' Honda e, Focus, Jaguar iPace, Volcano Yellow, MSO Black Pack 720S Spider.
Re: 3.5 headlight info please!
Don't worry Alan, it's back together again!AlanP wrote:I am borderline amazed to see the car looking like that!
Alan
Sent from my ELE-L09 using Tapatalk
2008 Supercharged Atom 3, Tesla Model 3 Long Range
Re: 3.5 headlight info please!
Tim,
I was meaning the lights and mudguards and fabulous cleanness! Thumbs up emoji.
A
I was meaning the lights and mudguards and fabulous cleanness! Thumbs up emoji.
A
Beautiful 2000 XJR, last ever supercharged Atom, Fiesta Active, 'Verstappen' Honda e, Focus, Jaguar iPace, Volcano Yellow, MSO Black Pack 720S Spider.
Re: 3.5 headlight info please!
Wow [mention]Fastlane[/mention] thanks for the great info. with that in hand, I'll be installing mine like a pro!
Cheers!
Cheers!
Re: 3.5 headlight info please!
Ah I see, thank you. You'll be pleased to hear thay I have since polished the exhaust, yet again...AlanP wrote:Tim,
I was meaning the lights and mudguards and fabulous cleanness! Thumbs up emoji.
A
Sent from my ELE-L09 using Tapatalk
2008 Supercharged Atom 3, Tesla Model 3 Long Range
Re: 3.5 headlight info please!
No problem. Feel free to pm me if you have any questions.Atlarge wrote:Wow [mention]Fastlane[/mention] thanks for the great info. with that in hand, I'll be installing mine like a pro!
Cheers!
Sent from my ELE-L09 using Tapatalk
2008 Supercharged Atom 3, Tesla Model 3 Long Range
Re: 3.5 headlight info please!
Ok [mention]Fastlane[/mention] you’re not kidding! I installed mine solo today and could probably purchase an Atom4 with all the trimmings if I kept a £ for every expletive used whilst playing ‘how to chase the nut in a blind hole’!!Fastlane wrote: ↑Fri Apr 23, 2021 2:28 pm I did mine in March. Here's my attempt at some instructions:
14. Now the most difficult bit - keeping the wishbone pushed away from the mount, put the bolt through the new light bracket and push this into the new hole - you may need someone to hold the bracket whilst you do this. You then need to push your fingers up inside the chassis mount whilst holding the nyloc nut until you can screw it on to the bolt. I used a 10mm spanner and some blue tac to hold the nut in place whilst trying to screw the bolt into it. This may well take some time and you will swear a lot....
In the end I used some double sided tape and a chunk of packing foam which worked really well. First side approx. 1.5 hours, second side 15 mins.
Thanks again for the pointers! - [mention]Karl V[/mention] how about a DIY section for instructions like this ?
-
Karl V
Re: 3.5 headlight info please!
Could do [mention]Atlarge[/mention]. I ended up doing a write up afterwards and creating a bit of a library - https://www.ariel.club/forum/viewtopic.php?f=54&t=17511
Another option could be to add a bit more detail and feature it as a project on the main website - https://ariel.club/category/projects/
Now that you've stopped swearing
Who is online
Users browsing this forum: No registered users and 1 guest